Connect Google Forms With Form Designer
Have you tried the Google Forms service yet? It is pretty sweet. Their servers are always available, speedy and secure. The data is processed instantly and presented in a neat summary.
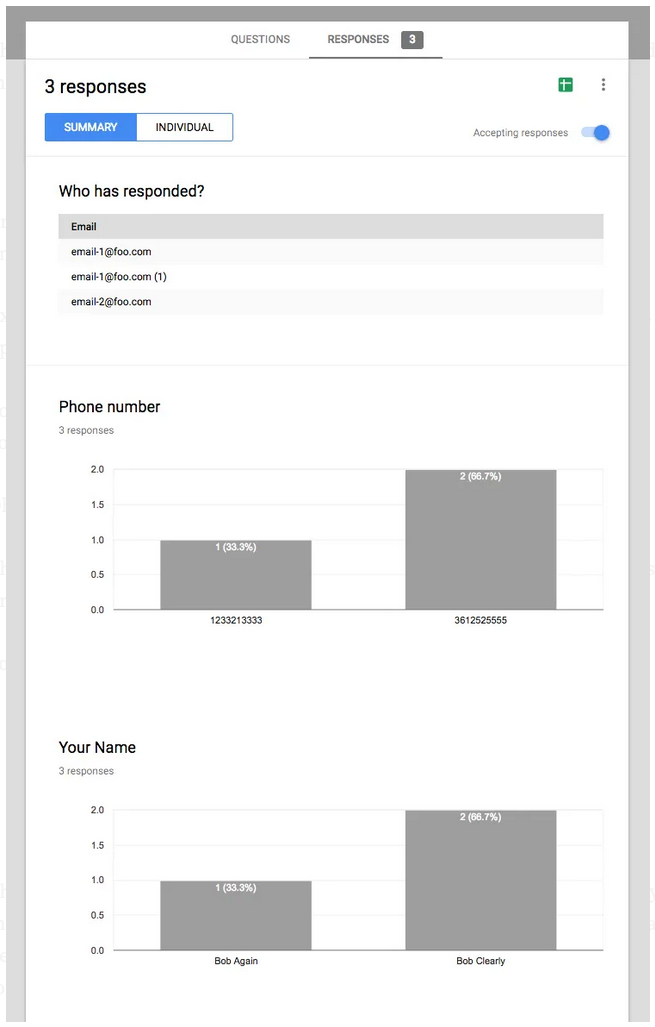
Browsing through the individual submit records is easy. Just click the ‘Individual’ tab or on any of the specific records directly.
Exporting all data to a spreadsheet is a single click away. This feature opens up a whole slew of additional presentational and analytical possibilities.
You can get email notifications when responses are submitted and the list goes on…
Oh, did we mention the service is free!?
There are a few things that would be nice to have, but overall the backend is pretty solid.
So, what’s not to like? The forms themselves!!
Studies show that well designed forms with great user experience increase the form completion ratio dramatically, in some cases with over 50%.
The Google Forms are not good looking. There is no control over typography, input styling, backgrounds, nothing. None of the good things that Google has been writing about in their Material Design series can be applied to these forms, which can negatively impact your completion ratios.
And here’s the other thing, which self respecting website would want to embed such a form? What carefully branded site would want to be tainted by that big white spot? It would be like slapping a pig on lipstick (I know…). Anyway, if I were a cool site I would rather die than being the home for one of these horrendously looking forms!
Is there a way to have Google Forms’ ease and functionality and still present a good looking form to the user? Absolutely, let’s take a look.
Custom designed forms to the rescue.
You may have read our previous article where we showed how a standard Mailchimp signup form can made to be responsive and fit a website’s look & feel using a bit of CSS. Just one peek at the HTML structure of a Google Form will quickly tell you that route looks rather closed. By the time we get to the first input field (Email Address), we already passed twenty div containers and are ten levels deep into the HTML….Aaarrgghhh!
In the image below the actual Email Address input field is close to the bottom, just below the ! —- THE EMAIL INPUT-- comment. And that is only the first input field.
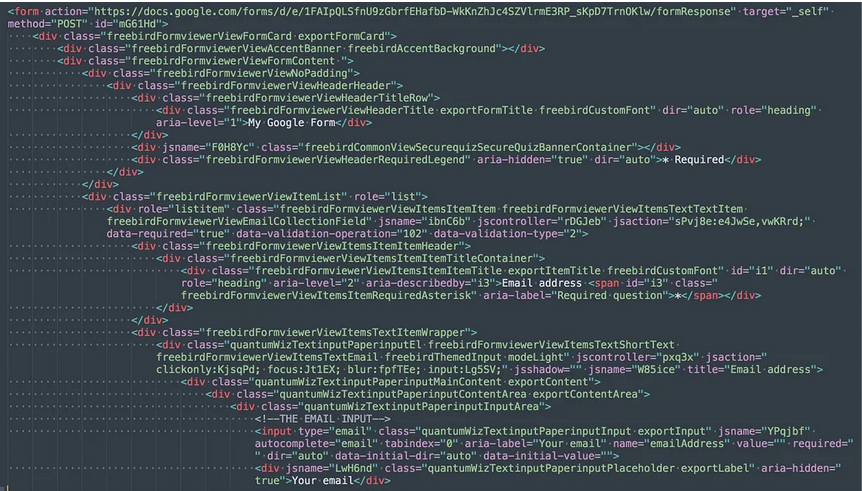
But showing the craziness of this code is not the only reason we added that screenshot. It also gives a few hints on how to connect a custom form to the Google service. That’s right, the forms don’t have to be created within the Google Forms Environment:
Custom built, and highly styled forms can submit to the Google Forms service, in a similar way we showed how to submit data from a custom form directly to Mailchimp.
We will get into that in a little bit, first let’s talk about why using a custom designed form is the right thing to do.
The case for using custom designed forms.
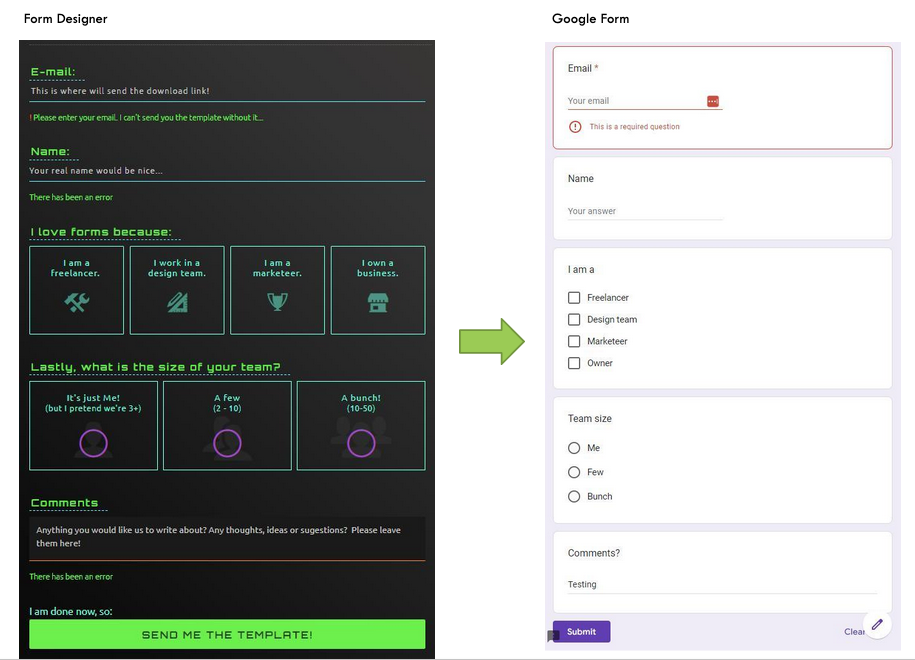
Going into the intrinsics of coding and styling a web form from scratch is beyond the scope of this article, for now please believe me that creating something sweet as the design below is totally possible.
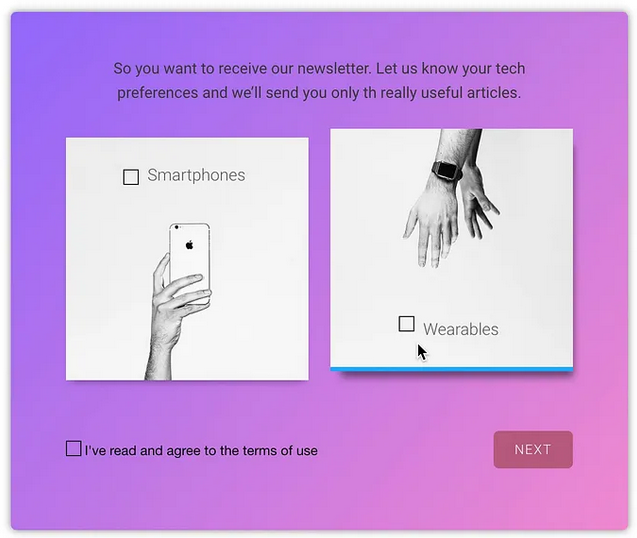
There is something important at work here: research indicates that these types of selectable images are among the most engaging question types. These visually attractive click or tab actions stand in big contrast to the very plain stacked checkbox design we saw in the Google Form above. Which would you rather click?
Increased engagement will help form completion ratios, so we would always go with a designed form. Something attractive. Something that grabs user’s attention. A form with a layout, images, typography and color scheme that fit the look and feel the website and brand. A form that is interesting and does not create the typical user reaction: “Ugh, do I really have to fill that out?”
Studies show that well designed forms with great user experience increase the form completion ratio dramatically, in some cases with over 50%. Well designed forms do not just look better, they also work much better — you will simply get way more out of your forms!
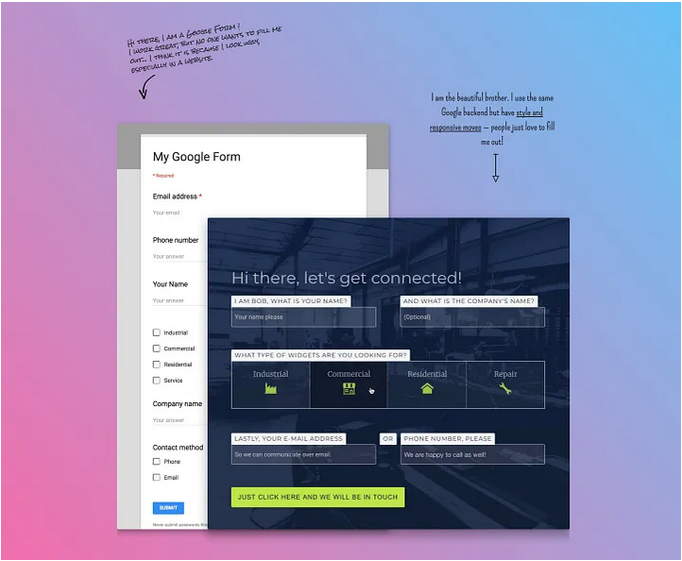
Hand coding a form like the above is certainly possible, but you have to know what you are doing. Personally I find that I am more creative and can focus on the design aspects when using a visual tool. Using Form Designer you design a beautiful form that actually matches your website styles and you can connect Google Form’s backend for processing.
The resulting code is super clean and way way leaner than what the form services, especially Google Forms, produce.

In the above code snippet the first input, which was twenty levels down and ten levels deep in the Google code, now is only five levels down and 3 levels deep. All we have to do is make this form submit the data to Google Forms.
Connecting a custom-designed form to Google has two simple parts:
- Connect the form action,
- Connect the inputs
Connecting the form action
The answer to the connectivity question lies in the two code screenshot we looked at above: the big one that shows part of the Google code, and the small one that shows the Form Designer output. Both start with the form element which includes the action attribute. In the small screenshot with the code of the custom form, the value of the action attribute https://docs.google.com/forms/d/e/1FAI… is the same as the value of that attribute in the Google code.
And that’s it!
Yep, that action URL is all we need to have our custom form submit to the backend of the Google Forms Service.
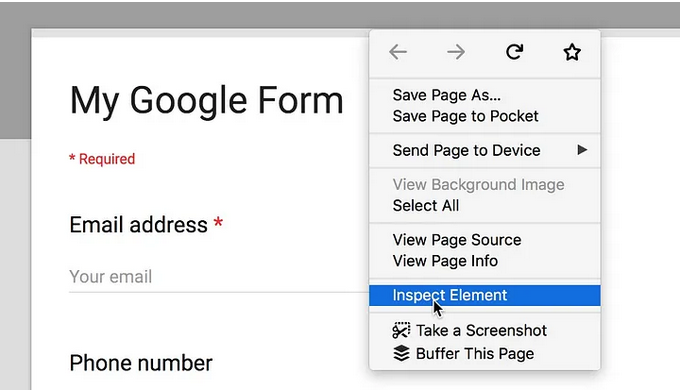
To find the value of that attribute right-click on the Google Form in the browser and select Inspect.
The action URL can then be found in the code window that (usually) opens at the bottom of the browser.
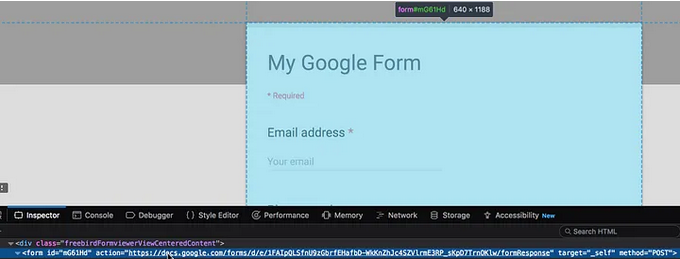
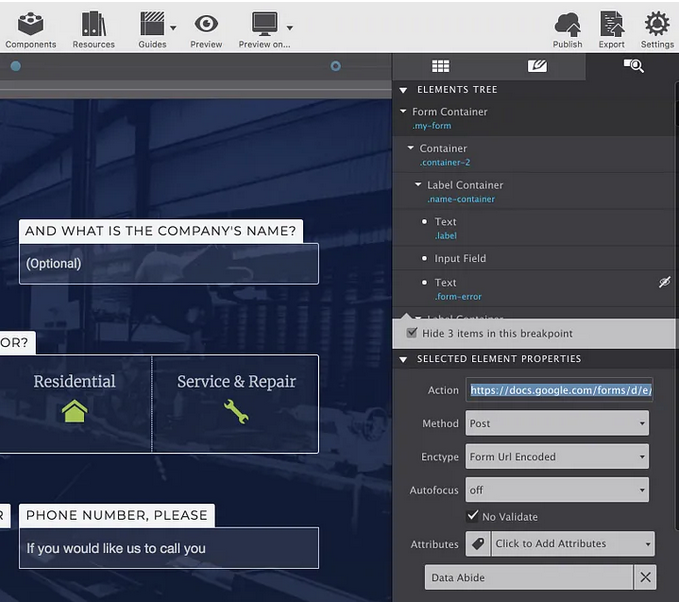
You can copy the URL from there and paste it in the corresponding place (action=”URL here”) in your custom form. If you are using Form Designer to create your custom form you can paste the URL in the Action box.
Connecting the form inputs
The only thing remaining is making sure the form puts the data in the right spots in the Google backend. Basically we have to ‘map’ the input fields in our form to Google. This can be done using the name attributes. There are two ways to gain access to the form name values.
The easiest way to find the field names in a Google form can be done by running your form (select the view option when in the Google Form edit mode) and enter responses in all the fields. Then open the browser developer tools window (F12 in Chrome).
Reviewing the form in the browser, press the Submit button at the bottom of the form. Select the Network tab in the developer window.
You will then select the first entry, FormResponse, in the Name column. Then select the Payload tab.
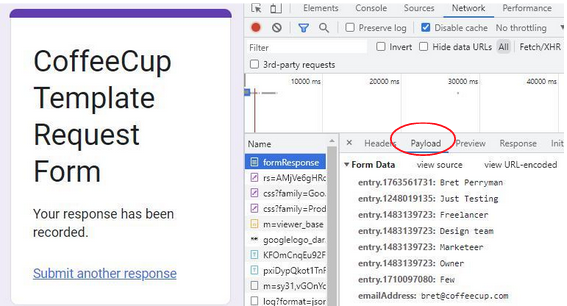
Under “Form Data”, all the Google form fields can be seen with the values you entered in the Google Form. Cut & paste the fields under “Form Data” into a text editor. This will make it easier for you to locate the fields you are needing. The Form Data names will look similar to the example below with a field ‘entry.12345670’. These values will be entered into your Form Designer fields in the Name field on the Inspector pane.

Please note that the order of fields under Form Data may not match the order in your Google form. So be mindful when copying & pasting the names into the Form Designer.
The image above shows the “Name” field being filled out from the form data saved earlier. Continue filling out the remaining fields using the information in the form data list. Note that Google forms always use “emailAddress” for the email address field.
The second method would be to map the fields using the Inspector Tool. This is not the easiest way to find the field names in a Google form, but still gets the job done with a little bit of extra work.
If, for some reason, you were unable to find the field mapping after submitting some test data, try using the browser “Inspect” tool. Hover the mouse over one of the fields, right-click and select “Inspect.” You should see a window open up with html code. Under the “form action” attribute, look for the class with role=”list”. Under “list” there are several listitem roles, one for each Google form field. As you hover over each listitem role, the corresponding field on your form will be highlighted.

Select one of the listitems and you will see the field information.

In the above example, we are looking at data for the “Name” field (note that the “Name” field on the left is highlighted). The field id is the first number after the double brackets.
Finding fields for a checkbox grid is a bit different. Each row in a grid has a unique field number that is shared by the columns.

As can be seen in the above grid example from a different Google Form, there are 2 rows and 3 columns. The field data is under one of the listitems, but the data for all the rows and columns is in one big block under the listitem. For each row, the row id comes just before the column names. Here is the same block of data with formatting and the field IDs highlighted:

And it’s a wrap folks— time to let your forms flourish too!

