

Working with PHP with Site Designer
When building dynamic and interactive websites, integrating PHP into your workflow can take your projects to the next level. In Site Designer, you can easily harness the power of PHP to add server-side functionality, manage data, and create more personalized user experiences. Whether you're new to PHP or looking to incorporate it into your design process, this guide will show you how to effectively work with PHP within Site Designer, ensuring your websites are both beautiful and functional.
Below are two examples of what we will be connecting the PHP scripts to. To download the example project file to work with it directly please use the link below.
HTML Contact Form
HTML Quiz Form
Third Party Hosting Required
Please note before starting that at this time, custom PHP files are not supported on S-Drive, but our development team is actively considering adding this feature. Want to see this capability included? Let us know by sharing your feedback through the link below!
Let us know you want S-Drive PHP Support here.
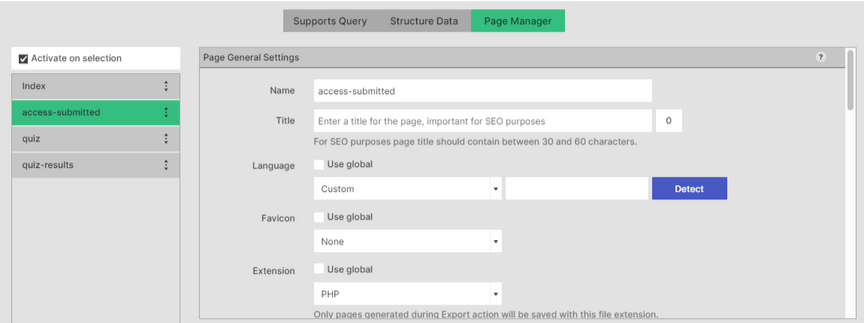
Page Naming
To unlock PHP's dynamic capabilities in Site Designer, the first step is to ensure your pages are saved as .php files. Unlike standard .html files, .php allows for server-side scripting, giving your website the power to interact with databases, process forms, and much more. Pages containing PHP code need to have the PHP file extension. This is configured within the Page Manager under Extensions. In the example below, the pages access-submitted and quiz_results have PHP code used to display the results after a form “submit”. Note that the file extension is set to “PHP” for the access-submitted page.
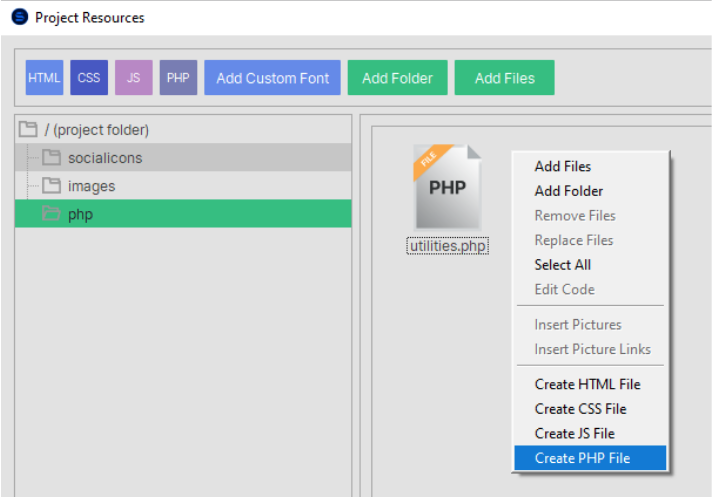
Files that contain 100% php code (e.g. php classes) can be placed in the project resources folder.
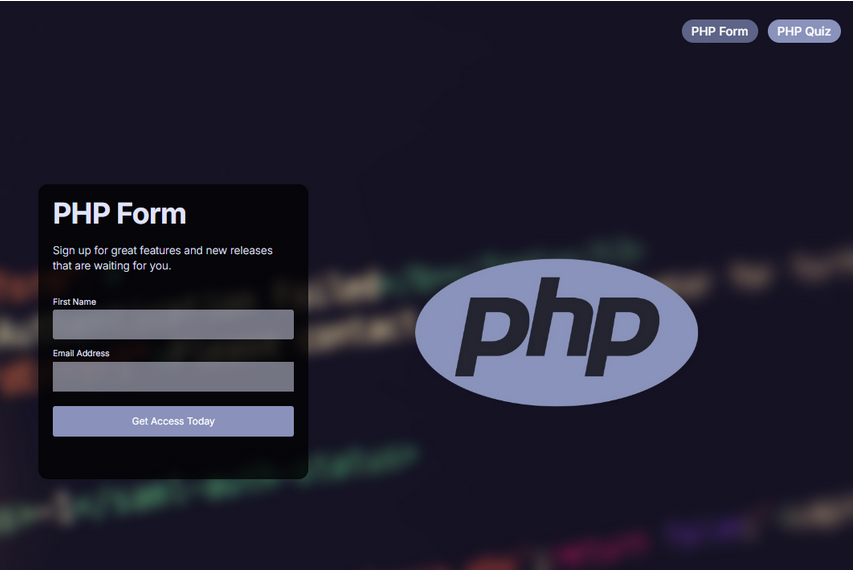
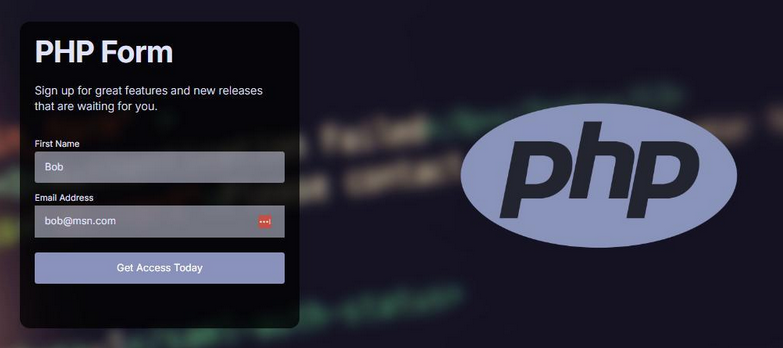
First page is a simple submission form collecting a Name and an Email. A Button Submit is also a part of the form.
Since PHP code runs on the server, to preview your site in action, you’ll need to upload it to a server that supports PHP. You can easily set up a local server or use a hosting provider to see your dynamic features in real-time. The form looks like this when viewed on a PHP-enabled site:
This is a standard HTML form configured as follows
- Form name: get_access
- Action: ./access-submitted.php
- Method: POST
- Encoding type: Url-encoded
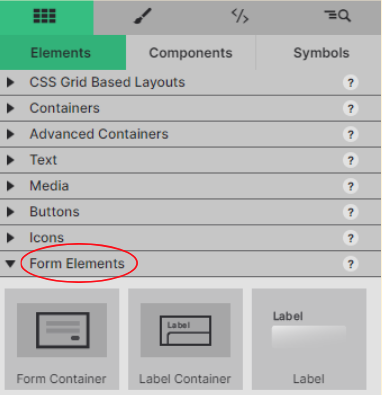
The form was created using the “Form Elements” section in the Elements panel.
Form Container Properties
To sync the form elements with your PHP, select the Form Container element. On the Element Pane you'll find the properties for the form submit. You'll want to confugure the page the the form should redirect to upon submit. Be sure to use the POST method on submit.
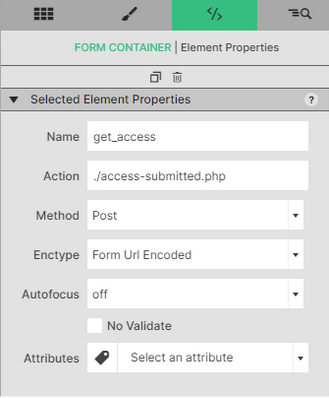
The “Action” should be set to a PHP page in your project where the form results will be processed. In the example above, the action page is ./access-submitted.php.
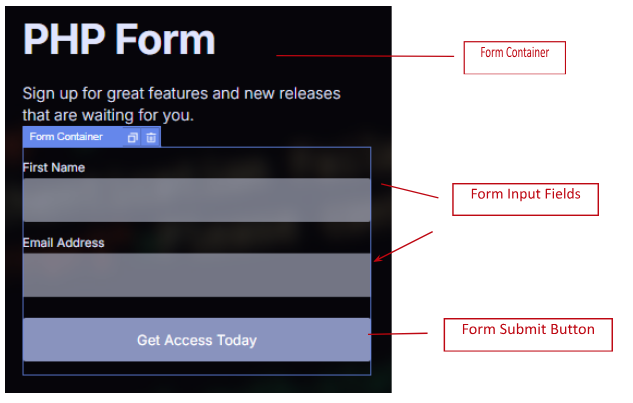
Form Page Setup
A Form Container with input fields and a submit button is required. Start with the Form Container and add additional items such as Input Fields and the Form Submit Button.
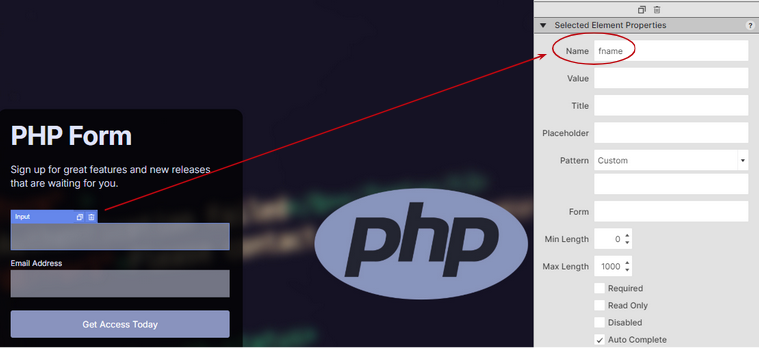
Field Properties
Field properties must be configured in such a way that they can be recognized by the php code on the form results page.
Field properties will show up in the global php $_POST array. For example, the php form above has a “First Name” input field with name configured as “fname”. When the submit button (“Get Access Today”) is pressed, the form results page will be processed and $_POST[“fname”] will have the user’s first name value.
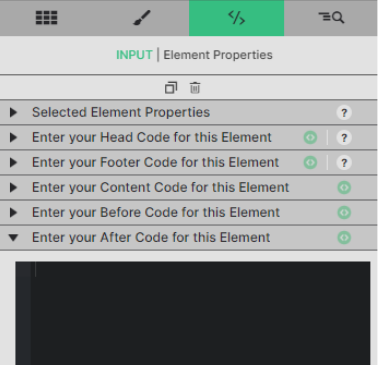
Form Result Pages, Code Block Configuration
In order to process form results after a submit button is pressed, Site Designer provides special code blocks that can be placed before, on, or after a field on the results page. These special code blocks can be found on the element properties panel (right after the “Footer Code” section). PHP code is entered into the code blocks to display field values on the server side.
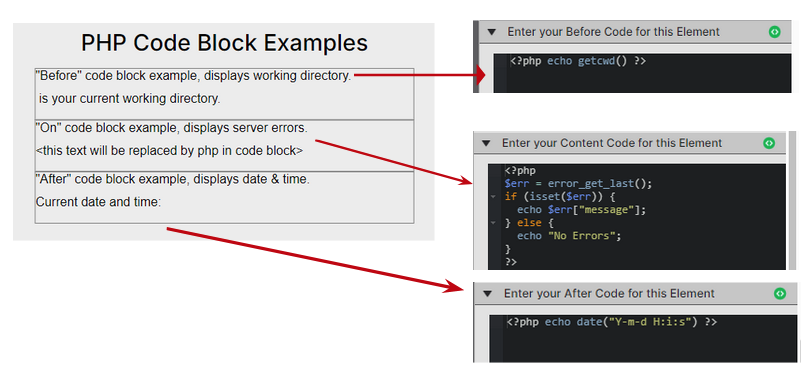
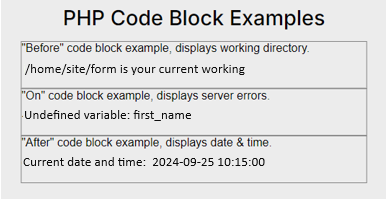
When a PHP page with the above example runs on a php-enabled server, the output will look something like:
Form Result Page for the “Get Access” Form
For the “Get Access” form on the index page, the results page is is ./access-submitted.php (as explained in the “Form Container Properties” page above.
The name entered by the user will be displayed on the “
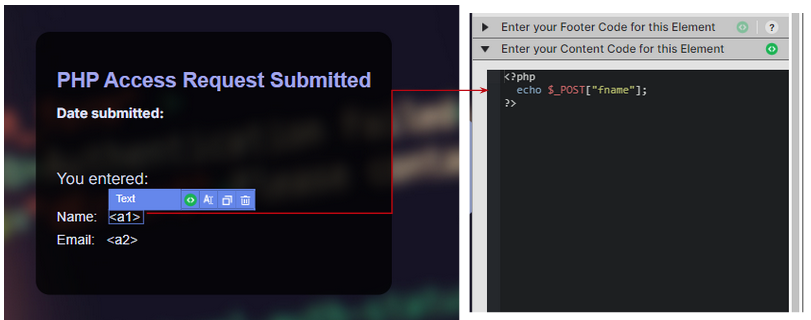
The same goes for the email “

“Get Access” Form When Viewed on a PHP-enabled Site

Note that “
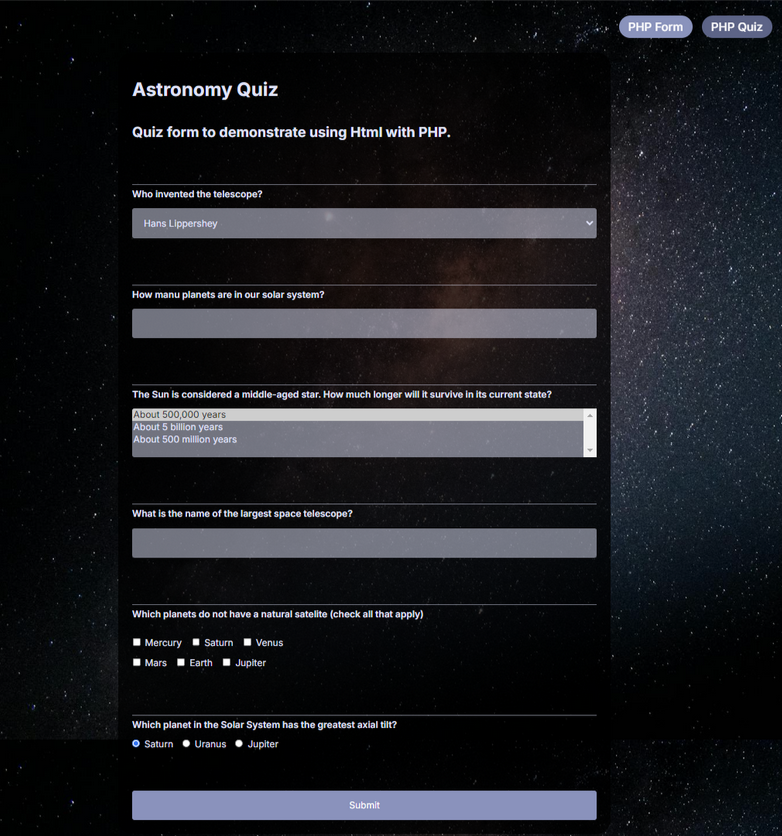
Quiz Form
The PHP template described in this example includes an astronomy quiz showing the use of several Form elements including text, number, check boxes, and radio buttons.
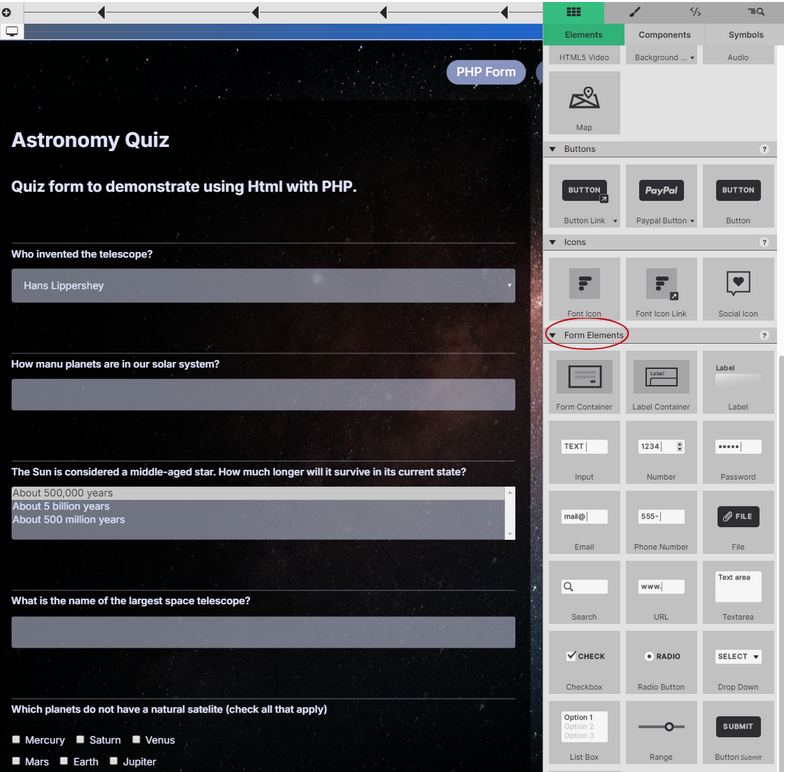
Take a look at the properties of each element. Note that the naming of elements must match the expected POST array values when the form results page runs on a php-enabled server.
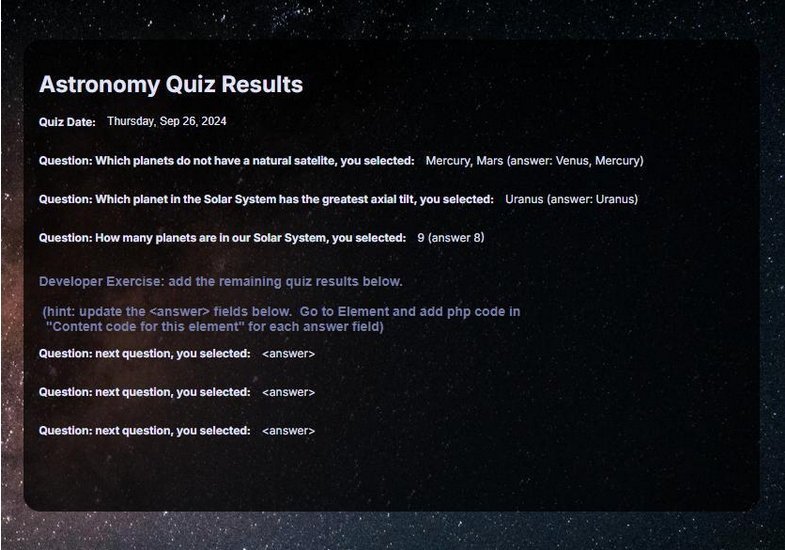
Quiz Results Form
Here’s an example of the quiz results form when run an a php-enabled site. Please note that only three results are shown in this example. Displaying the additional results will be your challenge to complete as part of this tutorial.
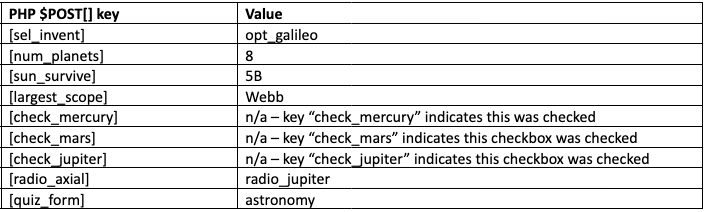
The php code relies on $POST[] array entries being filled in based on the field configurations in the form page. Example $POST array values for the astronomy quiz:
With these steps, you're well on your way to creating dynamic, data-driven websites using PHP in Site Designer. Ready to dive deeper? Explore more advanced PHP features and unlock even greater functionality for your projects!
Level up with the Site Designer help guide.
Site Designer gives you the power to work with CSS visually. These code-free controls allow you to experiment with new styles and layouts without having to be a pro at hand coding. Discover the power of Site Designer and start dragging, dropping, clicking, and sliding your way to an epic website.